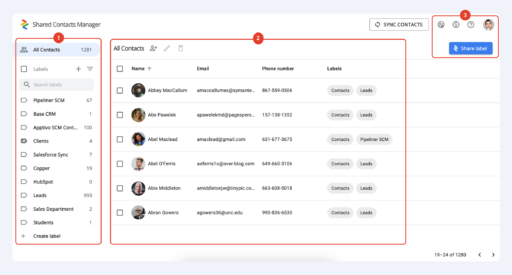
Managing contacts is a critical part of staying organized, whether you’re working solo or especially in a team. While Google Contacts offers a solid foundation, it often falls short when it comes to collaboration. If you’ve ever thought, “I wish I could share these contacts with my colleagues without a headache,” this article is for you. Shared Contacts Manager is the Google Workspace application designed to transform how you manage and share your Google Contacts.
With Shared Contacts Manager, you can easily distribute contact information across your team, providing everyone access to the right details at the right time. It’s intuitive, secure, and trusted by thousands of users worldwide. And with a 14-day free trial, you can experience all its benefits without commitment.
Ready to fill the gap that Google Contacts leaves behind and improve your workflow? Let’s see what the app is, how to set it up, and get the most out of this game-changing solution.
How to Install Shared Contacts Manager
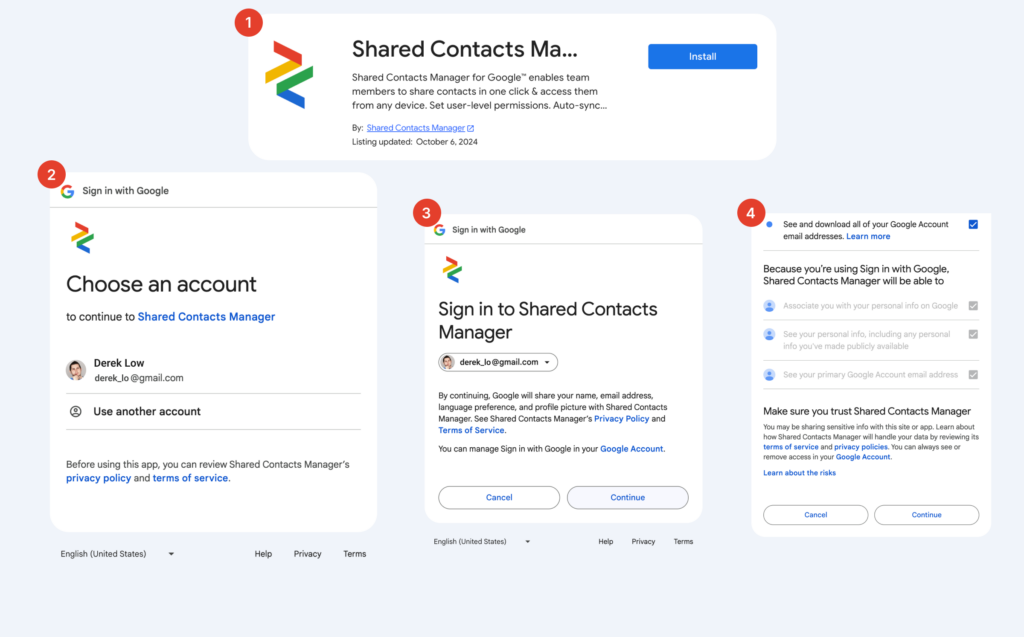
Installing Shared Contacts Manager is simple, quick, and doesn’t take longer than a minute. Follow these steps to get started:
- Go to the Shared Contacts Manager page on the Google Workspace Marketplace and click Install.
- Select the Google account you’ll use with the app.
- Review the Privacy Policy and Terms of Service.
- Click Continue.
| Pro Tip: For the best experience, ask your domain administrator to install the app across your entire organization. This unlocks additional features and makes managing shared contacts even more efficient. |
Once the app is installed, launch it to explore its user-friendly interface.
A Close Look at the App
Usability in any application depends on two critical factors: simplicity and clarity. A tool can offer a wealth of powerful features, but if users struggle to navigate it, those features lose their value. Shared Contacts Manager nails this balance with a straightforward interface that focuses on what matters most—helping you manage and share contacts with ease.
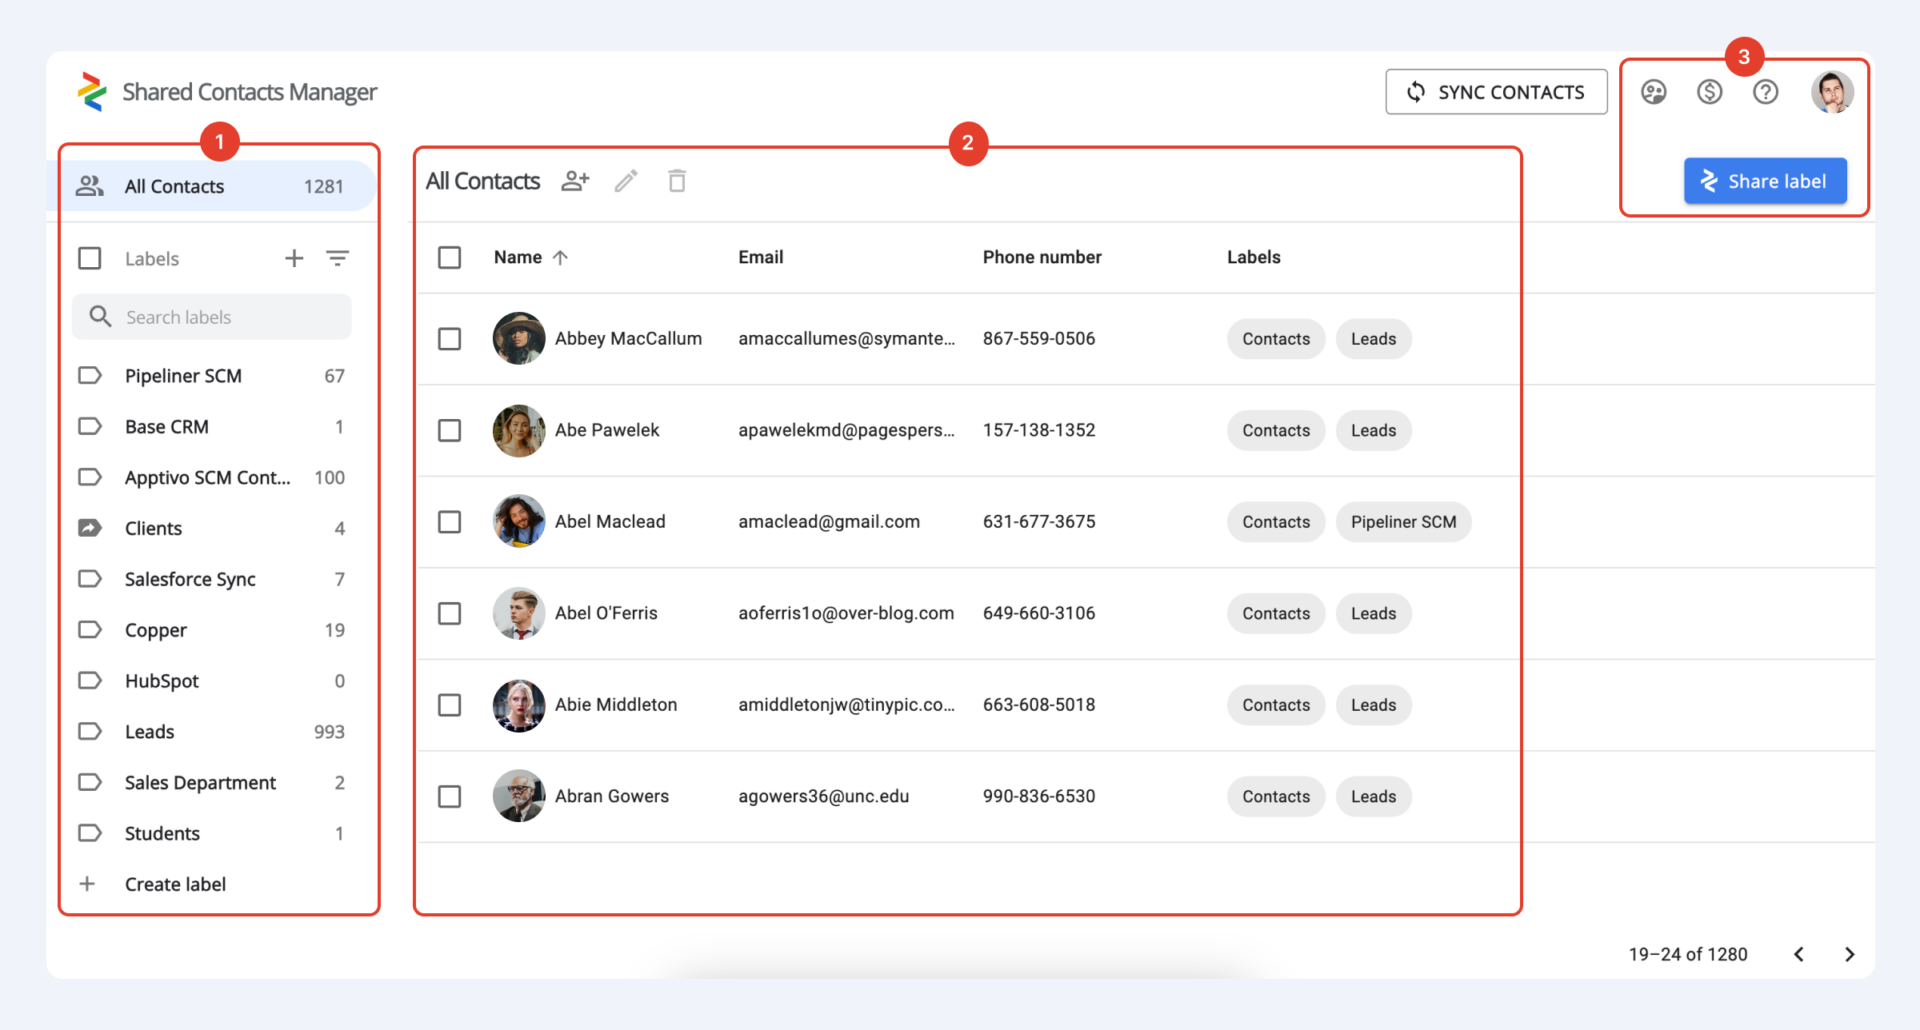
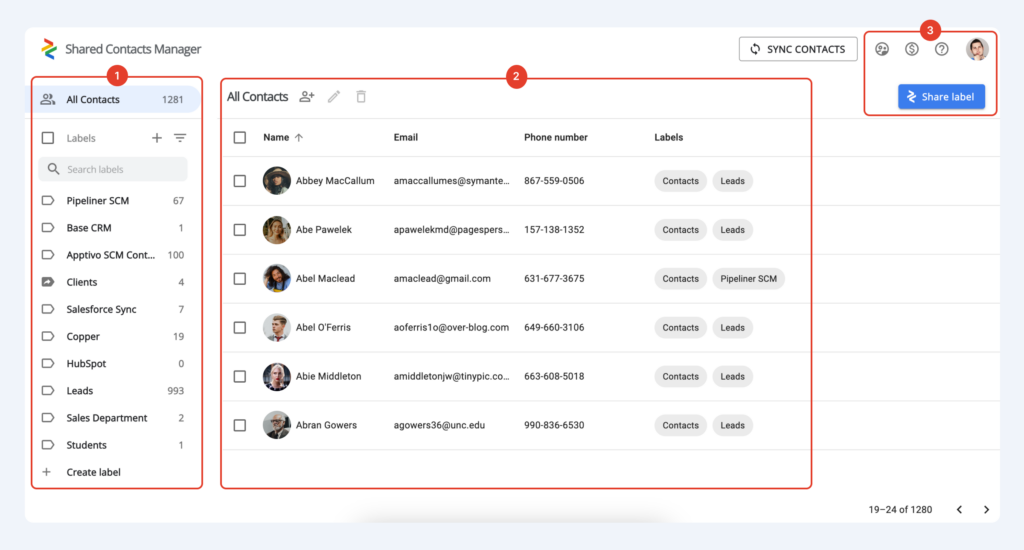
The app’s design reflects a deep understanding of user needs. Almost everything you need happens within a single screen, neatly divided into three functional sections. This thoughtful layout eliminates unnecessary clicks and helps to accomplish tasks quickly, no matter if you’re a tech-savvy user or someone new to contact management.
Labels (Left Sidebar)
This section organizes your contacts into intuitive categories. Labels serve as the foundation for managing and sharing your contacts. All groups here come from your Google Contacts. Shared labels are easy to spot – they’re marked with an arrow icon, while unshared labels appear with blank icons. If you have too many labels, a handy search bar at the top of the sidebar lets you find what you need in seconds.
Contacts (Center Panel)
The central area displays the contacts within your selected label or all contacts. Here, you can browse through contact details, add or remove them from labels with just a few clicks, and use All Contacts view to see every contact in your account, along with the labels they belong to, for a comprehensive overview.
App Management Tools (Top-Right Corner)
The top-right corner of the app is where subscription managers will find all the essential tools for overseeing the app. This exclusive section includes options for managing subscription and payment settings, viewing user roles, and accessing the app’s customer support. Regular licensed users don’t need to worry about this area, as it’s designed specifically for administrators. Customer support, by the way, is available for all users, and this is where Shared Contacts Manager also shines with its prompt and knowledgeable assistance.
Why It Works
Shared Contacts Manager’s interface proves that good design is not about cramming every possible feature onto the screen. Instead, it focuses on presenting the right tools in the right places. By keeping all key actions accessible from a single screen, the app minimizes distractions and allows you to focus on the task at hand.
This simplicity doesn’t just make the app easy for us. It enables you to work smarter, not harder. The layout supports productivity by reducing the time spent searching for features, navigating menus, or switching screens. Everything feels intuitive whether you’re updating contacts, sharing labels with a team, or organizing contacts for a project.
How to Use Shared Contacts Manager
Labels in Shared Contacts Manager are the backbone of efficient contact sharing. Yes, you can hit one button and share all your contacts, but it’s not always the best idea if you want to improve productivity. Creating dedicated labels for different teams, projects, or purposes guarantees that everyone has access to exactly what they need, without clutter or confusion. It also makes future updates easier, as you can quickly locate and modify specific groups of contacts.
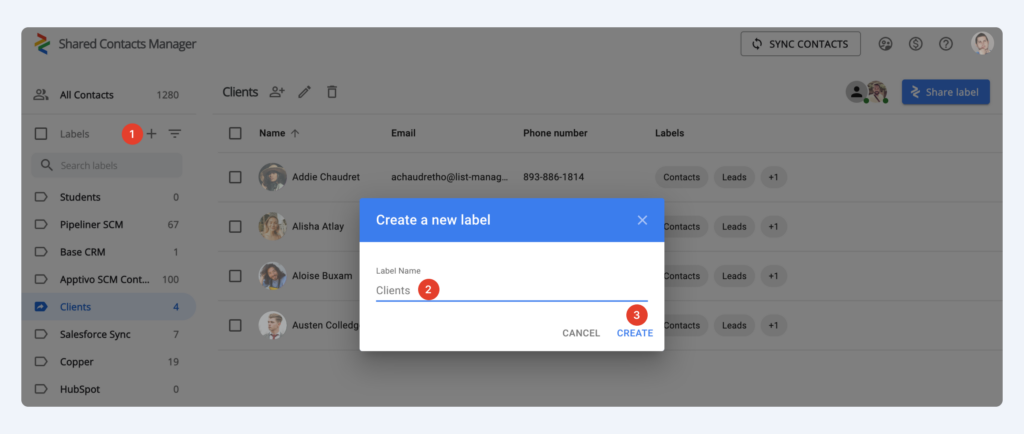
Here’s how to create a new label:
- Click the + Create label icon in the left sidebar.
- Enter a name for your new label in the pop-up window.
- Click Create to finish.
| Pro Tip: Be strategic with label names. Use clear, descriptive titles that reflect their purpose, like “Sales Leads Q4” or “Vendor Contacts”. This small step saves time and reduces mistakes when sharing labels across your team. |
Once your label is ready, you can easily add contacts to it and share it with specific users or groups.
How to Share a Label With Different Users and Groups
Sharing contact labels is the heart of what makes Shared Contacts Manager so powerful. Whether you’re collaborating with a small team or an entire department, the app makes it easy to distribute the right contact information to the right people.
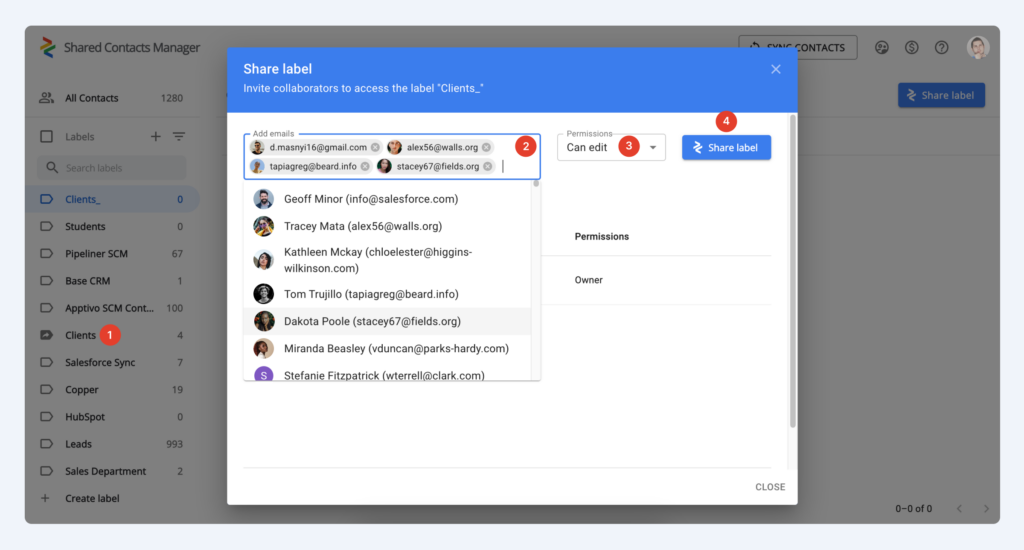
After creating a label, follow these steps to share it with users or groups:
1. Once your label is ready, click the Share icon (or the button) and a new window will appear where you can add users or groups to share it with.
2. To add individual users, click inside the Add emails field. A dropdown menu will show available users, or you can type their names or email addresses to search faster. You can add as many users as you need—there’s no limit.
3. Assign permissions to each user based on their role or responsibilities. The available permission levels are:
View only: The user can see the contacts but cannot make any changes.
Can edit: The user can view and modify the shared contacts.
Can reshare: The user has full editing rights and can share the contacts with others.
You can mix and match permissions depending on what each user requires, giving you total control over access.
4. Once you’ve added users and set permissions, click Share Label.
| Pro Tip: When working with larger teams, consider sharing labels with Google Workspace user groups instead of adding users individually. This way, any new team members added to the group will automatically gain access to the shared label without requiring extra work from you. |
The sharing process may take a few minutes to sync, depending on the size of the label and the number of users involved, but you don’t need to wait – Shared Contacts Manager handles everything in the background.
With customizable permissions and accommodating unlimited users, Shared Contacts Manager provides perfect collaboration while keeping your contact information secure and well-organized.
Conclusion
Shared Contacts Manager simplifies the way you manage and share your Google Contacts, saving you time and effort while at the same time boosting team productivity. Its intuitive design, robust features, and reliable performance make it a must-have tool for professionals and businesses of all sizes. Try it today and discover how easy contact sharing can be!

